I love an immersive experience, and when it comes to book printing, bleeds are one of the great ways to pull readers into the world of your book. Whether you want a full color background, a run-away illustration, or a line break that jets off the edge of the page, bleeds are the way to do it.
What is a Page Bleed?
A bleed is content extending off the edge of the page. This might be a picture, a background, even stylized text.
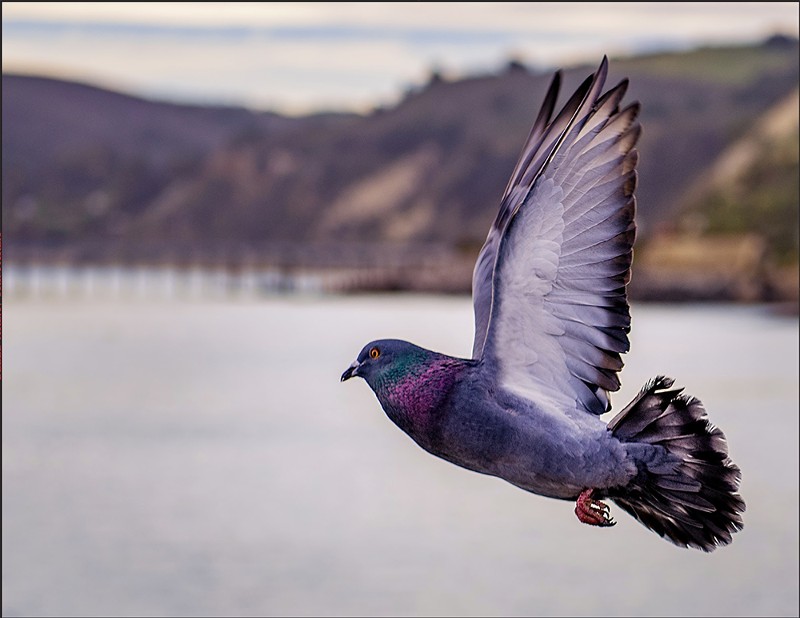
This page shows an example of a bleed

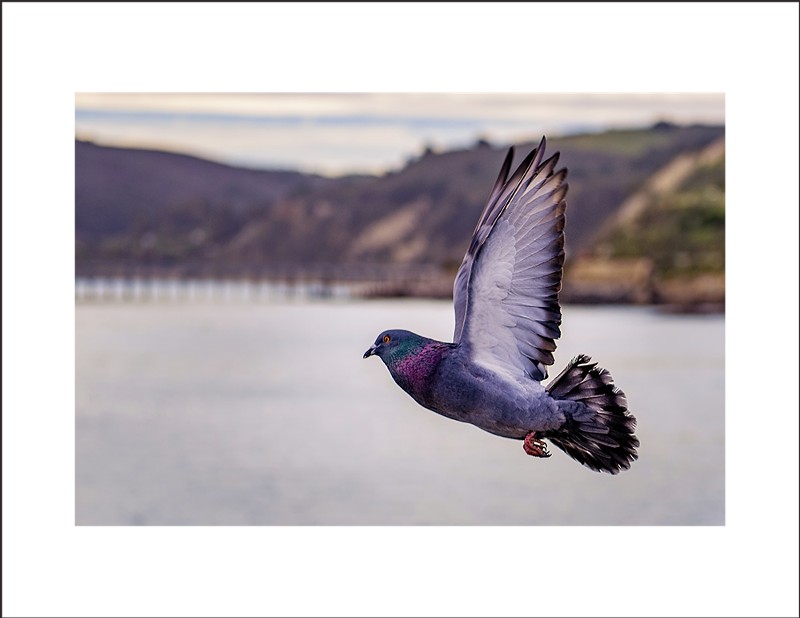
This page does not have bleeds

The photo of the bird touches the edge of the page in the first picture. This is a bleed and will require a special setup to print. The second page is the same photo but includes an empty margin space around the image, so it will not need any special setup.
Why Do Page Bleeds Require a Special Setup?
When you have content that touches the edge of your page, you’ll need to prepare your files with a bleed area. A bleed area is a small section on the inside perimeter of your pages that is designed to be cut off when your book is printed. This extra area acts as insurance against the inevitable movement that occurs during the book production process.
Book pages are printed on very large sheets of paper so that several copies can be printed on a single page. These large pages are then cut down to their final size. For the most part, any variation in this stage is impossible to notice. However, if you have a full-page image that is not set up with a bleed area, you’ll notice a little white sliver around the edge of your content. The bleed area prevents this from happening by giving the printer a little wiggle room when making the final cut.
What are Page Bleeds Used for in Printing?
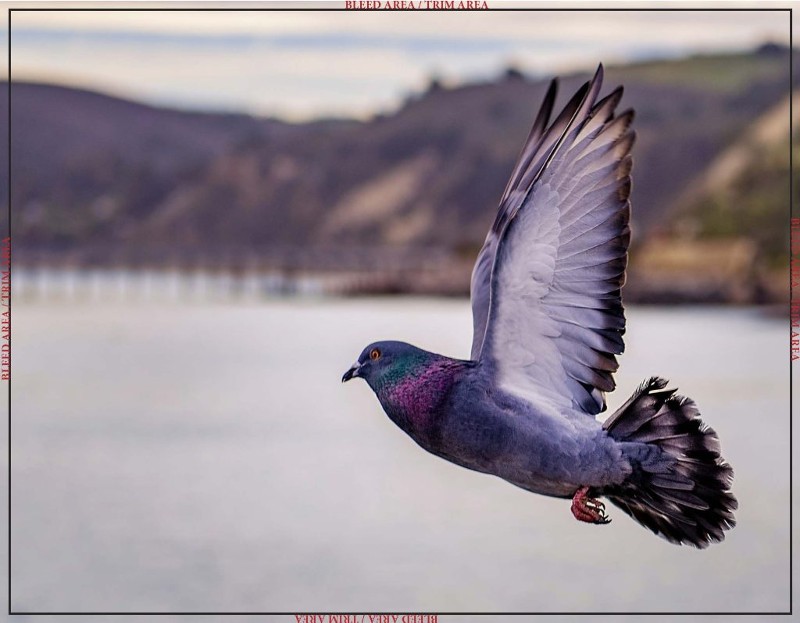
Let’s take the picture of the pigeon above. To print this as a full-page photograph, you’ll want to add a .125” trim area to the top, bottom, and sides of the image. Make sure that your image fills the entirety of the bleed area with no white space showing. That way, when this image is cut to its final size, the entire bleed area can be used a buffer.

When the books are printed, they will be trimmed down to the black line shown on the photo above. If a bleed area wasn’t included, when the books are trimmed, there would be white slivers around the edge of the photo. Even though they’re small, these white slivers would stick out like a sore thumb.
How to Add Bleeds to Your Document
Luckily, most book designer software make it super easy to add a bleed area to your document.
Adobe InDesign allows you to set your bleed area by navigating to File->Document Setup and clicking on Bleeds and Slugs.
If you’re using Microsoft Word, you’ll just go to Layout->Size->Custom Size, and then add 0.25” to your book trim size. For example, if you have a 6×9 book, you’ll set your document to 6.25×9.25.
Alternatives to Page Bleeds
If the idea of making a bleed area worries you, there is a simple alternative. The easiest workaround is to have at least 0.5” of white-space around the edge of your content. If you have this margin of space, you don’t need a bleed area.
It’s worth noting that every printer is different and may have different procedures for setting up your bleeds. And, as always, if you’re running into a roadblock, the best solution is to contact your printer directly. Candace and I are always available to help brainstorm!
Want to see examples of bleeds in person? Contact us to get a free copy of our guidebook.


I am learning every day