Menu
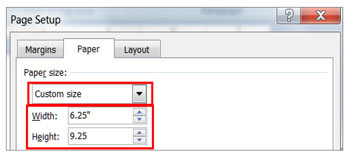
In printing, bleeds are the excess areas that extend beyond the final trim size of your book. Bleeds act as a safeguard, ensuring that there are no unintended white borders due to slight shifts during printing. If any images in your book touch the edge of your pages, you will need to make your document size slightly larger than your intended trim size. Typically, this means adding 0.125 inches to each side of the page. For example, if you are printing a 6x9 book, your document will have a width of 6.25 inches and a height of 9.25 inches.
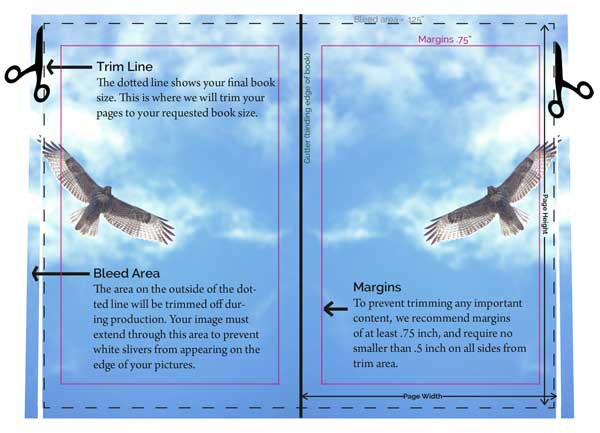
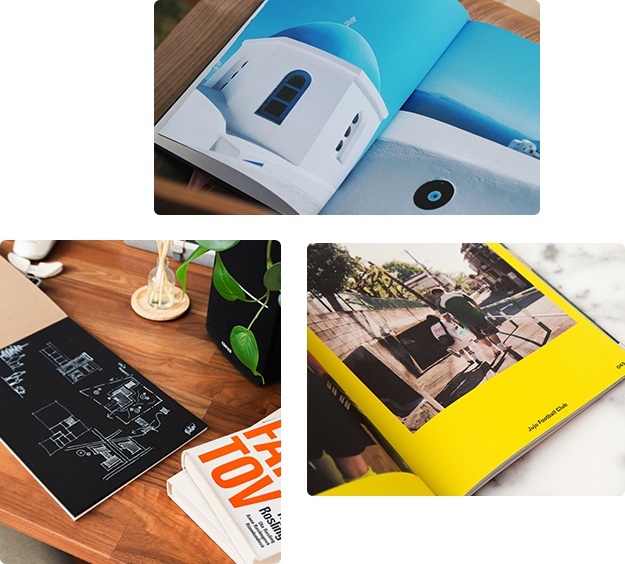
A bleed is when an interior page has photos, boxes, text or images that are intended to extend off the edge of the page. Any book that has interior bleeds will require a special setup. Bleeds impact cost: be sure to select 'Yes' for the 'Does the Interior Have Bleeds?' question when you make a quote. The illustration below is only to show Indesign bleed settings. PDFs must be provided as single pages, not spreads.
If you don't set your interior pages to properly bleed, you might see thin white lines that vary in width along the edge of the interior pages in your finished books. The book may also need to be trimmed slightly smaller to compensate for the missing bleeds.
The two most popular programs for preparing your book are Adobe InDesign and Microsoft Word.
Unlike most software, InDesign can set up a proper interior text page bleed.
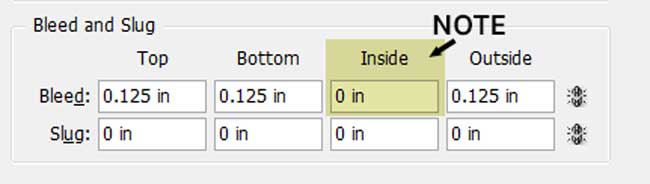
1. In Document Setup set your document size to the final trim size of the book. Set your bleeds and slug settings like the illustration below. The top, bottom and outside bleeds should be set to .125 (1/8 inch), and the inside (gutter) should be set to 0. When you are ready to make a PDF:
2. Select your desired export setting. We recommended PDF/X-4 or the newest PDF preset that's available within your version of InDesign.
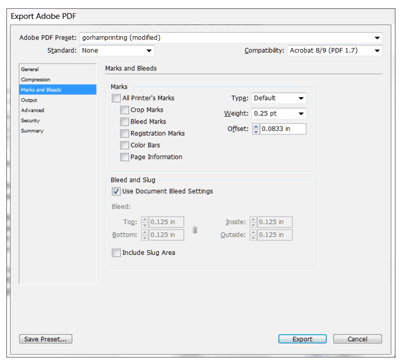
3. Under Export Adobe PDF options select Marks and Bleeds on the side menu. Make sure "Use Document Bleed Settings" is selected under Bleed and Slug. Compare your Marks and Bleeds Page to the preview shown here. Make sure no Marks boxes are selected.
4. Select Export. After your PDF is created please review your PDF file carefully. Check your PDF after the export is complete. The final PDF dimensions should be the trim width + .125 inch and your trim height + .25 inches.
*We do not print gutter (inside) bleeds. Toner in the gutter will compromise the binding adhesive. We will remove your gutter bleeds before printing. You may omit the gutter bleed from your document and submit your PDF with only a .125 bleed area on the three outside edges if your software has the capability to do so. Otherwise we will make this adjustment when we prepare your file for printing.
1. Word processing programs (such as Word) do not have bleed settings. To allow for the bleeds, you will need add .25 inches to your width and to your height. This will allow for .125 bleed area on all sides. (Example, if you would like a 6x9 book, you will need to make your document 6.25x9.25).
2. Set your document size by adding .25 inches to your height, and .25 inches to your width Here are some common book trim sizes and their equivalent document sizes:
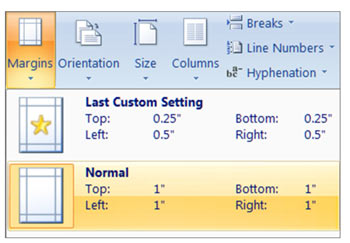
2. When you change your page size to include the bleed area your margins will not change. This means if you have your margins set to .75 inches on 6.25x9.25, after the bleed area is trimmed off you will only have .5 inch margins. We recommend increasing your margins to 1 inch to prevent important content from getting to close to the bleed area that will be cut off.
3. If you are ready to create a PDF and if you have Adobe software installed:
If you do not have have Adobe software installed please follow the instructions to create a PDF on our website page How to Make a PDF.
4. After converting your Word document to a PDF, check the PDF closely to ensure no unwanted changes occurred during the conversion and that your document is the correct size.
Use this tool to calculate the dimensions of your document with bleeds. Proper file setup ensures that there is no unneccessary white space around the page margins of your book.
Please review our text PDF checklist for complete instructions on how to prepare your interior text files for printing
Get marketing tips, design inspiration and more from the world of DIY book printing.
© 2026 Gorham Printing Inc. All rights reserved. Privacy Statement