Menu
Embarking on the journey of book publishing is an exhilarating endeavor that marries the artistry of words with the visual impact of images. In a world where every detail counts, the pictures within your pages are more than mere illustrations—they are storytellers, conjuring emotions and bringing depth to the narrative. Whether it’s the delicate interplay of shadows and light in a photograph or the sharp clarity of a vector illustration, each image is a pivotal piece of the reader’s experience.
As we venture into the realm of print and digital book production, the technical side of image formatting becomes the unsung hero of this creative process. Properly formatted images ensure that the visual tale you're telling is conveyed in its richest form, resonating with clarity and color on every page or screen. This meticulous attention to detail transforms good content into great and great into unforgettable. So, let's delve into the crucial aspects of image formatting, ensuring that your visuals are seen and truly experienced in the way they deserve.
The cornerstone of image preparation is selecting the appropriate file format, which can significantly influence the visual quality of your work.
TIFF (Tagged Image File Format): Revered for its “lossless” quality, a TIFF maintains all image data, ensuring that every pixel is preserved during saving. This format is quintessential for print, where every detail contributes to the tactile experience of the reader. In eBooks, TIFFs can be used, but their larger file size may require careful consideration to balance quality with performance.
JPEG (Joint Photographic Experts Group): While ubiquitous due to its "lossy" compression, JPEGs can degrade with each save, making them a less ideal choice for the final print product. However, they can be acceptable for eBooks if used judiciously, ensuring that the compression does not visibly tarnish the image quality on e-readers and tablets.
EPS (Encapsulated PostScript): When it comes to graphics like logos or intricate line art, the vector format of EPS stands unmatched. It maintains crispness regardless of scaling, an attribute vital for print and digital mediums where images may be resized to fit various layouts.
The concept of resolution, measured in dots per inch (DPI), is pivotal in distinguishing between print and digital image use. A high resolution of 300 DPI is standard for print books, ensuring that images appear sharp and detailed when transferred onto paper. On the other hand, for eBooks, the preferred resolution is often lower, at 72 DPI, which is optimal for screens and helps reduce the file size for faster loading and a better reader experience.

When incorporating images into your book's layout, understanding the difference between linking and embedding is crucial. Linking refers to the inclusion of images as separate files within the document, which keeps the overall file size manageable and ensures higher-quality outputs. On the other hand, embedding images adds the entire data into your file, leading to significantly larger documents that can be cumbersome to handle. For streamlined processing and to maintain image integrity, always opt for linking in page layout programs. In word processors, where embedding is common, disable image compression in the settings to preserve quality upon export.
Securing the right visuals entails choosing from high-resolution digital camera shots, licensed stock photos, or web images—with caution. Web-sourced pictures often come with resolution limitations and potential copyright restrictions, requiring due diligence. Always prioritize images you have the right to use and ensure they meet the necessary quality standards for your publishing format to maintain both legality and aesthetic integrity.
Please note that high resolutions are vital when converting physical artwork to digital: 300 dpi for photos and 600 dpi for line art. Employ scanning techniques that prevent moiré patterns and ensure the original quality translates well into the digital realm, preserving the integrity of the artwork.
The journey from camera to print or screen is paved with crucial color decisions. For print, images in CMYK allow for accurate color reproduction, while eBooks thrive on the RGB spectrum, vibrant across diverse e-readers. Anticipate color shifts and take the time to convert colors carefully to avoid unexpected results in print. We suggest utilizing Photoshop's color correction tools to fine-tune hues and contrasts.
To master Photoshop's color modes, switch from RGB to CMYK for print or optimize RGB for digital displays. Here, you can emphasize image integrity from the start— where you can scan at appropriate resolutions and in the correct color modes. Optimization in Photoshop involves tweaking levels and curves to achieve the right balance of color and tone, ensuring the images pack a visual punch without compromising on quality.

Certain best practices in image formatting stand out in a landscape crowded with varying standards. Ensuring images have the right resolution, format, and color profile is paramount. When handling prints, 300 dpi TIFFs preserve detail, and for eBooks, resized and compressed JPEGs offer a balance between clarity and load time. Make sure to always keep original files intact for future revisions.
Immaculate image preparation begins with high-caliber equipment. Cameras with high resolution and large sensor sizes capture finer details necessary for print. For eBooks, even though lower resolutions suffice, starting high gives flexibility in editing.
Lighting also casts the stage for photo clarity and mood. Invest in consistent lighting setups to ensure each image reflects the desired atmosphere. Remember, staging is an art—compose with intent and allow space for design elements and text overlays. The use of high-quality lenses, tripods, and a keen eye for composition turn ordinary shots into captivating images for any book format.
Crafting the layout of a book is much like arranging pieces in a puzzle; each image must seamlessly fit the page's dimensions. Whether you opt for portrait or landscape shots, ensuring they harmonize with your page design is essential. Remember to leave ample space around your subject, considering how the image might be cropped for the perfect fit. This approach not only prevents crucial details from falling into the book’s gutter or being trimmed off but also preserves the integrity of your visuals, ensuring that every picture tells the full story it was meant to.
In the realm of photo editing, less can often be more. It's tempting to keep tweaking, but the key is to enhance, not overshadow, the original beauty of your photographs. Adopting non-destructive editing methods allows you the flexibility to revert or modify without harming the image's essence. Stick to file formats renowned for preserving quality, like TIFF, to ensure the images retain their vibrancy from screen to print. A consistent hand in editing helps to weave a visual consistency that echoes through the pages of your book.

Imagine a dance between your vision and the designer’s expertise, each step in sync to create something beautiful. Open and ongoing dialogue with your book designer is crucial—after all, they are your partner in bringing the visual elements of your book to life. Offering a variety of images—showcasing different perspectives and compositions—gives your designer the artistic license to select the best fit for the layout. Plus, understanding the nuances of bleed is not just technical know-how—it’s about crafting the book with precision, ensuring every image lands just right, and that the final product is as you envisioned, without a pixel out of place.
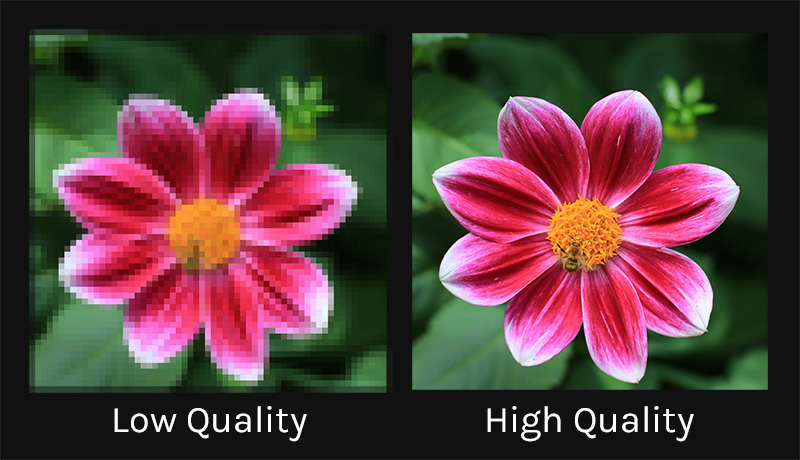
When preparing images for print, clarity is king. High-resolution images are the foundation of crisp, clear printing that breathes life into every detail on the page. As you fine-tune your images, aim for a resolution that ensures the sharpest quality without sacrificing speed or efficiency in the printing process. Equally important is color fidelity—this demands a precise calibration of your images to the CMYK color space, ensuring that the hues you've carefully selected translate perfectly from digital to print. Consistency is key; sticking with formats like TIFF and PSD will help maintain the integrity and vibrancy of your visuals throughout the production cycle.
Adapting images for eBooks is a balancing act of aesthetics and technology. Since devices vary in display capabilities, resizing images to suit a range of screens is critical—sharp enough to delight the eye yet scaled to support smooth performance. Compression comes next, reducing file sizes for swift downloads without noticeably diminishing image quality. Notorious for their compression efficacy, JPEGs often become the format of choice. Lastly, stripping away extraneous metadata from your image files is a subtle but effective step toward optimizing your eBook. It's a meticulous process where every kilobyte saved contributes to your digital publication's seamless delivery and enjoyment.

In the tapestry of book production, images are the vibrant threads that add depth and texture to your narrative. As we've explored, preparing images for print and eBooks is both an art and a science, essential to ensuring that your readers' visual journey is as compelling as your written word. Remember that each detail, from the resolution to the color space, is pivotal in bringing your vision to life.
Now that you're equipped with the knowledge to perfect your images for any medium, the final step is to bring your creation into the physical world. At Gorham Printing, we understand the significance of this moment. Let us take the baton and help you cross the finish line. With our expertise and your mastery over image preparation, your book will not only be published but will shine in the hands of eager readers.
Are you ready to turn the page and start this exciting chapter? Reach out to Gorham Printing today, and let's make your book unforgettable.
Have questions? Call us to talk with a team member from our Washington office. You’ll always talk to a real person, and we answer in seconds. Plus, you’ll have a dedicated rep working with you through every stage of your print order.

Get marketing tips, design inspiration and more from the world of DIY book printing.
© 2026 Gorham Printing Inc. All rights reserved. Privacy Statement