Menu
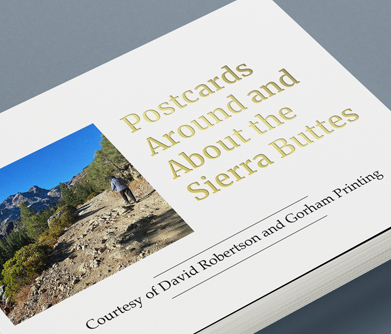
Real foil can be stamped onto your cover creating a brilliant, textured effect. This is done by pressing hot metal foils onto your book using solid copper dies in the exact shape of your design. We offer our standard gold and silver foils but can also provide custom colors upon request. Foil stamping is a great premium feature that is sure to make your cover really stand out!
Foil Stamping requires specific file and design set-ups to ensure the stamping will have a clear and concise look. Below are step-by-step instructions for creating a foil stamp file using Adobe Photoshop. If you are using a different software program, these instructions may still be useful to follow and adjust accordingly to your specific program.
Need help setting up your cover PDF? Review our Cover File Requirements.
The design can be as simple as the title of the book or a more complex logo or linework. Due to how the stamp is pressed onto the cover, there are some restrictions to the design to consider when looking for a clean and crisp foil stamp. Your design will be on a metal plate that presses the hot foil onto the cover. If the design is not put together properly, it can lead to the foil bleeding past the intended design or pitting and flaking within the foil itself.
Listed below are some things to watch out for when creating your design:
1. Mixing thin and thick lines
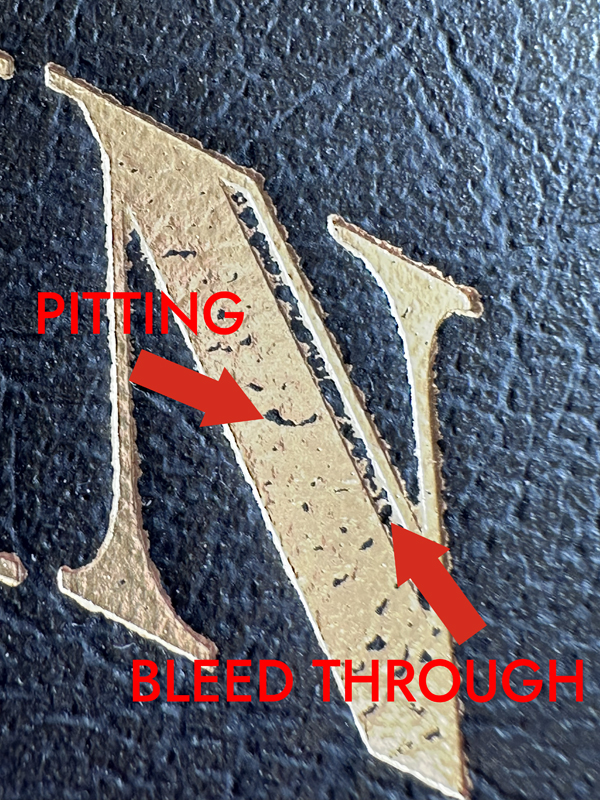
If a design has a mix of thick and thin lines throughout it can lead to an inconsistent stamp. The thicker the lines, the harder the metal plate has to press onto the cover in order for the foil to evenly distribute. However, that also means the thinner lines are pressed too hard causing the foil to bleed through and spread much farther than the intended area and will become distorted.
Trying to compensate for the thinner lines instead can have the opposite effect where the thick lines have little holes or flakes called pitting throughout as the foil didn’t fill the entire design.
The most optimal design should keep the thickness of the line as consistent as possible. If there is a thicker area, provide as much room as possible that allows thinner lines to grow without distorting the overall design.
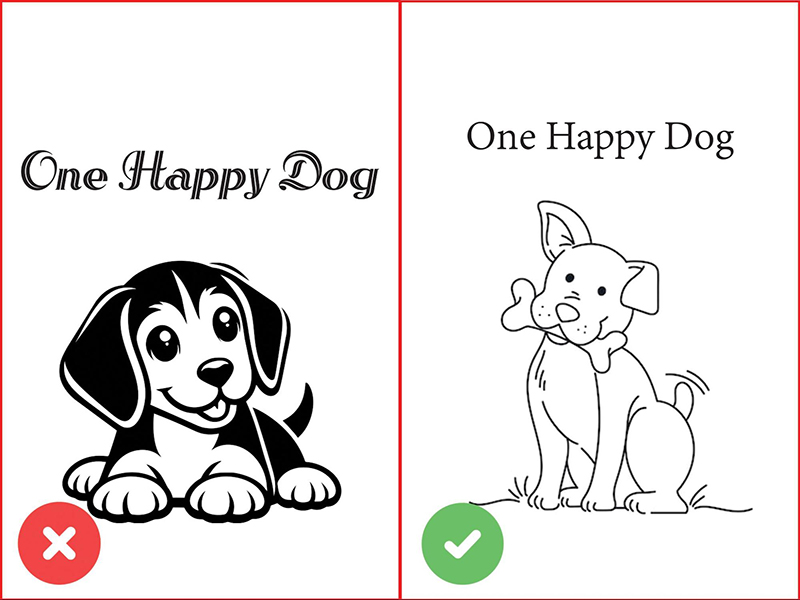
2. Avoid small details
Compared to digital printing that can handle all the small details, foil stamping presses the foil which can cause lines to expand too much, losing the small details and resulting in a blob. If there is a lot of detail in a small area, opt for thin lines with plenty of space in between that allows the foil to expand without overlapping.
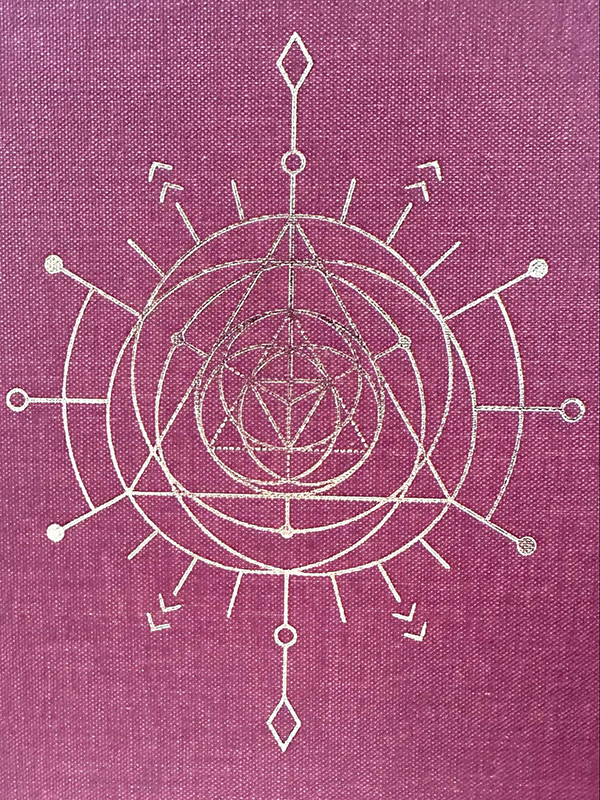
3. Small margins are a no go
A clamp is used when pressing the hot metal plate to the cover during stamping. If the design is too close to the cover’s edge it will become distorted and prone to flaking. We require a minimum .8” margins on the front cover. Foiling on the spine should have plenty of room from where the spine bends so that it does not begin flaking as well.
Once you have assembled the design for your foil stamp it is time to set the file up!
Layers are like stacked, transparent sheets of your artwork. You can see through the transparent areas to the ones below. This allows you to work on each layer independently without affecting what you have on another layer. Layers will be useful in making sure the placement and size of your Foil Stamp is the exact same as your cover.
As you can see in this scenario, I already have two layers. The first layer is my cover template and the layer on top is the cover. Whatever your Foil Stamp is going to be should NOT be on your cover. There is always going to be some inevitable movement during production and the stamp will not perfectly overlap what is already printed on the cover. So, if you want the title of the book to be Real Foil, do not include it on the cover layer.
Before placing the Foil Stamp file on top of the cover, make sure to create a new layer to keep the two files separate. The file that contains your foil stamp should have a transparent background with all indicators true black only (100% K).
You will then want to move all indicators where you want the foil to appear on the cover, keeping in mind the large margins required for Foil Stamping. Once you have the Foil Design arranged where you want it to appear on the cover, it is time to create PDF files!


With the Foil Stamp indicators placed where you want the foil to be pressed on the cover, it’s time to create PDF files. In this scenario, I want to create two PDFs: one for my cover and one for my Foil Stamp. Since I already have all my necessary materials in their respective layers, it will be as simple as hiding the layers before creating a PDF.


I’m going to start with creating a PDF of the cover. In your layers menu, you will want to hide the Foil Stamp layer and the template (Note: you can leave the template layer visible if you prefer). These layers can be hidden by clicking the eye next to the Foil Stamp and Template layer. This will leave only the cover visible which is what you want when creating a cover PDF. Depending on what program you are using, you will either need to save-as a PDF or export the file to a PDF. With Adobe Photoshop, you will need to click ‘Save-As’ under ‘File’ and choose ‘Photoshop PDF’ in the ‘Save as type’ list. After naming the file and clicking save you will now have a PDF file for your cover!
Now it’s time to create the Foil Stamp PDF. It will be the same steps it took to create the cover PDF, but instead of hiding the Foil Stamp and Template layer, the Cover and Template layer will need to be hidden instead.
After saving (or exporting) your Foil Stamp layer into a PDF file your file should appear to have a transparent background with the specified areas filled completely black.

Voila! Now you have two PDF files, one for your cover and one for the Foil Stamping. Both files will be ready for print as they are in the correct size for your book based on the template size that was used. Now when you receive your printed book the real foil in the color of your choice will be stamped specifically where you want it to be!
Need help setting up your file? Not sure if foil stamping is right for you? No problem! Our team is ready to answer your questions. If you would like to see a sample of our foil stamping, we can mail you one of our previous books for free. Contact us for more details.

Get marketing tips, design inspiration and more from the world of DIY book printing.
© 2026 Gorham Printing Inc. All rights reserved. Privacy Statement